WARNING! This restoration procedure is designed for advanced users only! If you do not feel comfortable reformatting your own computer, please call a RealityDesign technician at (818) 701-1075.
CONTINUE AT YOUR OWN RISK!
BEFORE YOU BEGIN, PERFORM ALL TASKS ON THIS CHECKLIST:
- Reformatting your computer will completely erase all data on your hard drive. If you have files on your hard drive that you need to keep, back them up now.
- Locate your motherboard CD now. If you have lost your motherboard CD do not continue to the restoration instructions yet! Go back to the help center and download all of the drivers listed for your system. Burn all of the driver downloads to a CD or back them up with your other files from step 1, then continue.
- Uninstall anti-virus programs such as Norton or McAffe and be sure to de-activate or de-authorize any software such as iTunes. Reformatting without doing so will use up one of your activations / authorizations.
RESTORATION PROCEDURE:
FOR A PRINTER FRIENDLY VERSION OF THIS PAGE CLICK HERE. (Microsoft Word File)
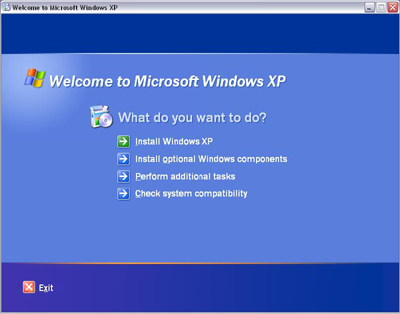
1. Locate your Windows XP Home Edition, Windows XP Professional, or Windows Server 2003 CD. Put the disk in your CD-ROM drive now. Close the automatic installation window when it pops up.
2. Print this page! After this step you will no longer have access to the Internet or your old files so be sure to print this page for use later.
3. Restart your computer with the Windows CD in the drive.
4. By default, all RealityDesign computers are set to boot first from the CD-ROM drive. If for any reason you have modified these settings in the BIOS, enter the BIOS now and set the CD-ROM drive as the first boot device. Save the BIOS settings and exit, then continue to step 5.
5. After the startup screen disapears (in most instances this will just be a picture related to your motherboard) you will see a black screen that says, "Press any key to boot from CD...". When you see this message, press any key.
6. You should now be at a blue screen that says Windows Setup. In the bottom left you will see Setup loading various files for the next 1-5 minutes depending on your operating system. Once the files are done loading, it will say, "Setup is starting Windows."
7. You are now at a screen labeled "Welcome to Setup." Press enter.
8. Press F8 to agree to the license agreement terms.
9. It will now show a list of hard drives and partitions found on your computer that have windows installed. This should be C:\Windows. Press ESC, to install a fresh copy of windows.
10. You will now see a list of all drives and partitions currently installed in your computer. Select your first partition (C:) and press the D key.
11. WARNING! AFTER THIS STEP IS COMPLETED ALL DATA ON YOUR SYSTEM DRIVE WILL BE PERMANANTELY EARASED! Press the enter key to delete the partition. If required, press the L key to confirm.
12. You are now back at the list from step 10. You should see an item called "Unpartitioned space." Select this and press the C key.
13. By default, the partition size will be the maximum possible size of your drive. It is recommended that you use this number. Press the enter key to make the new partition.
14. You are now back at the list from steps 10 and 12. You should now see an item called "Partition# [New (Raw)]." Select it and press the enter key to set up windows on the new partition.
15. You will now be given a list of file systems to use for your new partition. Select "Format the partition using the NTFS file system (Quick)" and press enter.
16. Windows will now format your partition. This should take 5-30 seconds depending on your partition size.
17. Windows will now examine your disk. This will take less than a minute.
18. Now that Windows has finished examining the disk it will begin copying the windows installation files. This should take 3-15 minutes depending on the operating system you are installing.
19. When finished copying files, windows will automatically reboot your computer. DO NOT press any key to boot from the CD like you did before.
20. It will now boot into the remainder of the windows installation.
21. After a few minutes some windows will come up asking for various information. First, it will ask you for region and language options. Just click next.
22. Next, enter your Name and Company (optional). This name is not used for your username, so you should use your real name here. Click next to continue.
23. The Product-Key for your windows CD is located on your invoice and on a sticker located on your computer that looks like this:
If your case has a drive door, your license sticker is located on the reverse side of your drive door. If your case doesn't have a drive door, it will be on the back of your computer by the power supply. Enter your Product-Key and click next.
24. Next, you can create a name for your computer (which is used to identify it on a network) and, optionally in Windows XP Professional only, a password for the system Administrator. Setup generates a random name for your PC, but renaming it to something you can identify with is recommended. Click next to continue.
25. Next, you can supply the date and time, which are auto-set based on information in your BIOS, and the time zone, which is set to PST by default. Change these as appropriate. Click Next to continue.
26. In a minute or so another window will come up asking for network settings. Just use the default "Typical Settings" and click next.
27. Next, depending on your operating system, a network components window will pop up. In this phase, you can choose to keep the default settings (recommended) or enter custom settings. It's generally best to leave it as-is, unless you have specific needs dictated by your ISP or network. Click Next.
28. Next, In Windows XP Professional only, you will be able to select a workgroup or domain name. Windows XP Home Edition doesn't work with Windows domains, however, and Setup will automatically supply the workgroup name MSHOME, which you can change later. The default workgroup name in Windows XP Professional is WORKGROUP. Click Next to continue.
29. Setup will now complete the installation. In the process of finishing the installation your computer may be automatically rebooted again. Remember NOT to boot from the CD.
30. Once your computer has successfully completed the installation it will boot into Windows for the first time.
31. A display settings window will come up. Just press OK .
32. Welcome to Windows XP. Click next.
33. You now can activate your copy of windows. This step is optional; you can activate your copy of windows any time within the next 30 days by going to Start -> Programs -> Accessories - > System Tools - > Activate Windows. In most cases you will need to install your motherboard drivers before your internet will work. For this reason Windows will be unable to be activated at this screen.
34. You can also register with microsoft. This is different than activating and is completely optional. Unlike activation, there is no time period requirement for registering with microsoft. When you first get your computer from RealityDesign it is not registered with microsoft.
35. Next, set up your user accounts. If only one person will be using the computer, or you do not care about having individual user accounts, just type in your first name and click next. Note: If more than one name is entered you will boot to a login selection screen instead of booting directly into Windows everytime you turn on your computer.
36. Your computer should now boot into windows. You can now take your Windows CD out of the drive. Put in your motherboard CD or the CD you made with your drivers on it. Install all of your drivers and then reboot your computer.
37. Now that your drivers are installed, your internet should be working. You can now activate Windows. If you get a message saying your CD-Key has been used too many times, or that you need a new CD-Key, select the " Telephone" option at the bottom. You will be given a number to call. Simply tell the Microsoft representative that you had to reformat your computer and he/she will give you a new CD-Key.
That's it! You're all done. If you have any questions feel free to contact RealityDesign technical support.
|